


-
Par Evanescence* le 25 Avril 2016 à 14:00
 Link on tagThis tutorial is property of Feline C31This traduction is property of Évanescence
MATERIAL
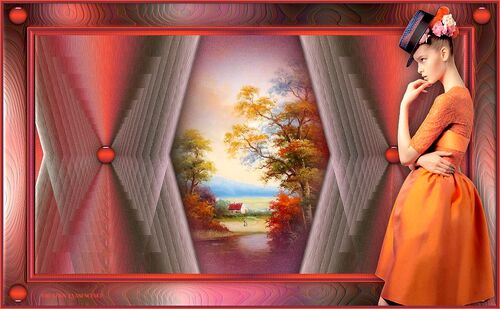
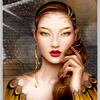
Thanks Tocha for beautiful woman tube
to Luz Cristina for landscape tube
Nikita for flower deco tubeJewel for the Word Art
FILTERS
Toadies/ Ommadawn
Toadies / What are You ?
Unlimited /Papier Texture/ Fribrous Paper coarses
Eyes impact5/ Perspective Shadow
Put gradient in your file
double clic on preset perspective Abisha shadow,
it will go directly in your file
Colors of this tutorial

1-Open a transparent layer ( Raster1) of 900/550 px
2-Fill with color 1
3-Effect Unlimited / Papier texture/ Fribous paper Coarses

4-Open maske Monaiekje mask 34
5- minimize it
6-Layer new layer ( Raster 2) fill it with color 2
7-New layer of mask from image

8-Merge groupe
9-Effect , edge effect, accentuate
10-Go on rater 1
11- layer, new layer raster 2
12-Put gradient Nature c in foreground
linear 325/0

13-Fill layer with gradient
14-Mode of layer on overlay opacity 100
15-Open landscape tube of Luz Cristina
15B- go on layer on top of pile
16-paste as a new layer
17-selection tool
 Position Horiz 241 Vert 93
18-Mode of layer, hardlight, opacity at 40
19-Merge all visibles
20- Adjust / Light and contrast
( optional, dépends on your colors)

21-selection tool


22-Transform selection into layer
23-adjust, blur, gaussien blur at 10
24-layer, new layer ( Raster1)
25-Fill with color 3
26- Sélection / modify/ contract 20
27 -Fill with color 1
28 -Sélection/modify/contract 5
29 -fill with color 3
30 -Sélection /modify of 5
31- Suppress on keyboard

32-Selection inverse
33 -Effect Screenworks / Lace screen défault ( 113)
34-Effect drop shadow 0/0/50/20 black

35-Sélection / inverse
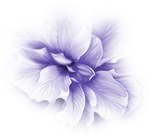
36-Open tube Nikita flower
37-Copy into selection
38-adjust, sharpness, more sharpness
39-Deselect
40-Merge down
41-drop shadow 0/0/50 20 black, same values as in point 34
42-duplicate layer
43-adjust / radial blur

44-layer organize move down
45-Effect Toadie / Ommadawn

46-Mode of layer on overlay opacity 100
47- Layer new layer raster 1
48-selection tool


49-Fill with color 2
50-Sélection/ modify/contract of 5
51-fill with color 1
52-Sélection / modify/ contract of 2
53-Fill with color 2
54-Effect Screenworks / Lace screen same as in point 33
55-Ne rien sélectionner
56-Effect drop shadow 2/2/50/10 black

57-Effect Toadie Ware are you ?
( Toadies filter is in material, use this one, as in unlimited
you won't have same result)

58-duplicate layer
59-merge down
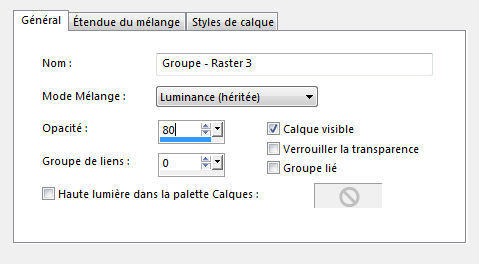
60-Mode of layer on Luminance L /Opacity at 90

61-Effect personnal Embosse 3
or adjust sharpness, sharpness
62-Go to merged layer
63-layer new layer
64-fill with white layer
65-Open mask Narah_mask_Abstract86
66- Layer of mask from image

67-Merge groupe
68- drop shadow 1/1/50/ 10 black

69 -Mode of layer Luminance L /Opacity of layer at 80
70- Image Mirror
71 – Image flip
72-Open déco chain
73-paste as bew layer
74- sélection tool
Position 82/ -25
75-Move layer under the layer of the frame
76-Add a border of 1 color 4
77-Copy
80-Add a border of 2 white color
81-Add a border of 1 color 4
82-Sélect all
83-Add a border of 35 white color
84-Sélection inverse
85-Copy memorized image into selection
86-adjust,blur, gaussian blur at 10
87-Transform sélection into layer
88-Effect Gallery H / reverb défault
89-adjust, sharpness, sharpness
90-Selection inverse
91 -drop shadow 0/0/50/40 black

92- deselect
93 - Merge all visibles
94-Open Word Art de Jewel
95- paste as new layer
96-Resize at 70 %
97- sélection tool
Position horiz 312 vert 279
98-Open tube, woman of Tocha
99- paste as a new layer
100- Image/ Mirror
101-Resize at 68%
102-Place on right
103-drop shadow
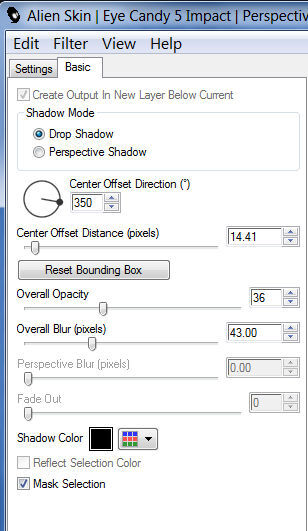
104-Eyes impact5 / Perspective shadow / preset Abisha shadow
(Paramèters if preset doesn't work)
105- add a border of 1 color 4
106- Add a border of 1 color 2
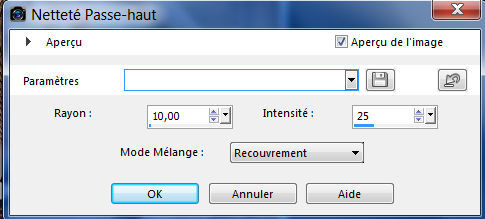
107- adjust / sharpness/ sharpness high pass 10/25
Sign
Resize at 900 pixel width
Than You
Feline C31
-
Pour accéder aux tutos des créateurs
cliquez sur le cœur
en dessous de leurs
bannières

-

Derniers Articles
-

Lumières d' Automne
-


-


-


-

-


-


-

-

-


-


-


-


-


-


-

-

cliquez sur le logo au dessus site amis pour ouvrir la page
-

-

-


-


Pour mettre mes bannières
sur votre site ,cliquez sur l'une d'elles vous aurez les codes pour les incorporer
To put my banner on your site, just click on anyone of the two you have and you will have the codes on the opening page
-
-

-
Allez visiter le site de Rénée Graphisme pour vos filtres et plein d'autres choses encore
-
Livre d' Or

