


-
Par Evanescence* le 11 Avril 2016 à 00:49

Link on tag
This tutorial is property of N Design
its traduction is property of Evanescence

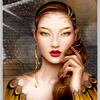
LUCIE
BY
N DESIGN
I advise you to browse my site with Internet Explorer
This tutorial was made with Pspx2,
it can be done in other versions
MATERIAL
FILTERS
Simple
Medhi
AP lines
Colors used for this tutorial
Aidez vous de cette flèche pour suivre le tutoriel


Foreground :#FFFFFF
Background :#7a2a33
Gradient

1
* Open a transparent layer 900/600 px
* In your color palette put as
foreground color #FFFFFF
background color #7a2a33
* Plugin filter Medhi Wavy Lab 1.1

* Plugin filter AP Lines- Silverling

2
* duplicate layer
flip vertical
* Go on to raster 1
* Add new layer
* Fill it up with color #FFFFFF
* Charge mask 1.png from matérial
* layer, new layer of mask from image
* Check inverse

* Merge group
* Go on to copy of raster 1
* Resize at 80%
* Select all
* Selection floatting
* Sélection static
* Selection modify
* sélect borders of selection
choose both sides
anti aliasing checked

3
* add new layer
* Fill selection with color #FFFFFF
* Déselect
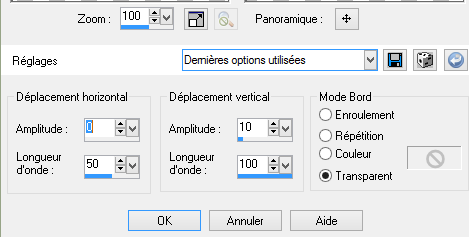
* Effects, distorsion effects, waves
* duplicate layer
* Image flip horizontal
merge down
* Sélect with magic wand tool the 4 ellipses
like this

* Fill them 4 with linear gradient
* Drop shadow

* Déselect
* Merge down
* Effects, edge effects, accentuate
* Plugin, filter, Toadies ,What are you 20 20
4
* Duplicate layer
effects, geometric effects, circle
transparent

* Image Resize at 70 %
all layers not checked
* Duplicate layer
* Resize at 70 %
all layers not checked
* Merge down twice
* Image resize at 35%
* Adjust , sharpen, sharpen
* Place this layer like this model , on top

* Duplicate layer
* Image flip
* Merge down
* Duplicate layer
* effets, image layer, seamless tiling, defaut values
* Mode of layer Normal ,opacity at 55
5
* Go on copy of raster 1
* Duplicate layer
* Plufin filter Andromeda perspective

* Place it a little bit on the left
* Duplicate layer
* Image flip mirror
* add new layer
* Copy and paste tube c-josy
* Place it like on model
* Mode of layer luminance Legacy
Décorations
* Copy and paste tube Lizztich or other
* Resize at 50%
* luminance Legacy at 57
* Place it like model
* Drop shadow 0 0 65 30 black color
* Copy and paste tube verlaine lizztich or other
Borders
* Ajouter une bordure de 1 px dark color
*1 border of 5px light color
* 1 border of 1 px dark color
* 1 border of 15 px light color
* 1 border of 1px dark color
* 1 border of 30px light color
* Select all
* Sélection modify contract of 30 px
* selection inverse
* fill it up with your first gradient
* Plugin filter graphic plus cross shadow, defaut values
* Filter ap lines silverling dotty grid
* Sélection inverse
* PLugin filter filtre AAA Frame photo frame

* Copy and paste tube of woman
here Malackatube
* Image flip horizontal or mirror
* place it like the model
* Effects 3D , drop shadow 0 0 65 30 black
* add one border of 1px dark color
* add one layer
* Add your signature
* your tag is finished
* just resize if necessary
and register under format Jpg
I thank you for having done my tutorial
and I hope you enjoyed it
NDesign
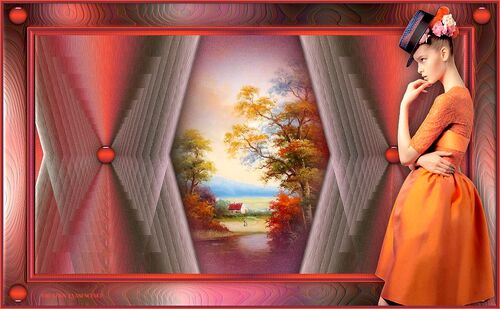
My version
woman tube of Luz Cristina that I thank

-
Pour accéder aux tutos des créateurs
cliquez sur le cœur
en dessous de leurs
bannières

-

Derniers Articles
-

Lumières d' Automne
-


-


-


-


-


-


-

-

-


-


-


-


-


-


-

-

cliquez sur le logo au dessus site amis pour ouvrir la page
-

-

-


-


Pour mettre mes bannières
sur votre site ,cliquez sur l'une d'elles vous aurez les codes pour les incorporer
To put my banner on your site, just click on anyone of the two you have and you will have the codes on the opening page
-
-

-
Allez visiter le site de Rénée Graphisme pour vos filtres et plein d'autres choses encore
-
Livre d' Or


