


-
Par Evanescence* le 28 Juillet 2020 à 20:56

Tutorial translated in english by Dennis
Thank You Dennis


This tutorial is my personal creation.
It is forbidden to copy or distribute it without my permission.
Any resemblance to others is a coincidence.
Please do not remove the watermarks of the tubes provided.
Please respect the work of the tubers.
Thank you for your consideration.
MATERIALS
You can download by clicking on the flower below.
Tube by Isa P. Thank you Isa
Misted tube is from the Web.
3 Selections (put them in your PSP Selections Folder)
Isa’s site

FILTERS
Simple
Flaming Pear / Flexify 2
Dsb Flux / Stream
Graphics Plus / Cross Shadow
Xero / Porcelain
Alien Skin Eye Candy5 / Impact
*********************
Colors Used / Light Color / Foreground #bda0d6
Dark Color / Background #390771
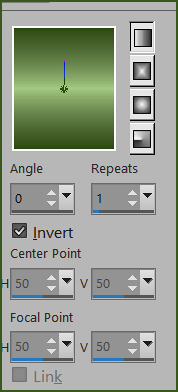
Materials Palette / Gradient / Linear / 0 / 1 and Invert Checked
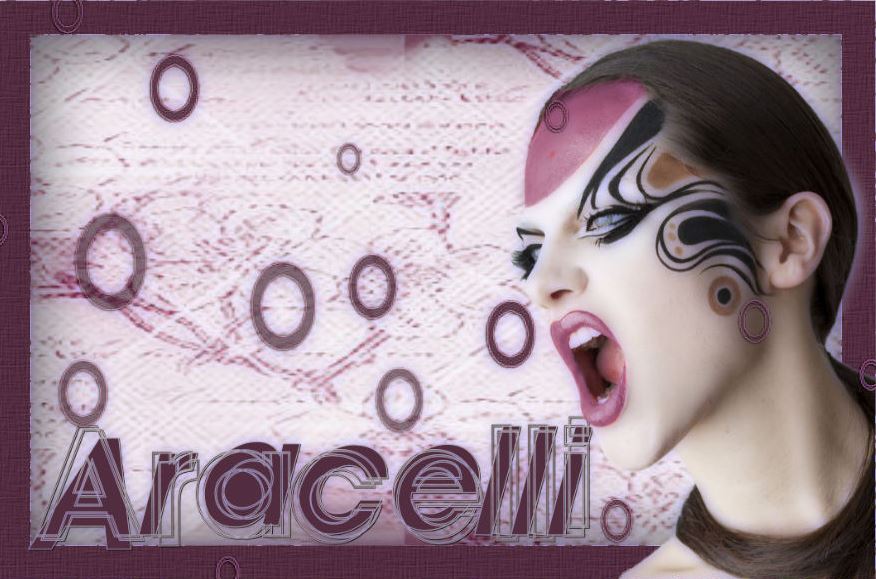
Open a New Transparent Image 900 / 600
Flood Fill the Layer with the Gradient
Selections / Select All
Copy and Paste your Main Tube into the Selection
Selections / Select None
Effects / Image Effects / Seamless Tiling (Default)

Aadjust / Blur / Gaussian Blur 30

Effects / Plugins / Filters Unlimited / Simple / Blintz
Layers / Duplicate
Image / Mirror / Mirror Vertical
Layers / Properties / Opacity 50%
Layers / New Raster Layer
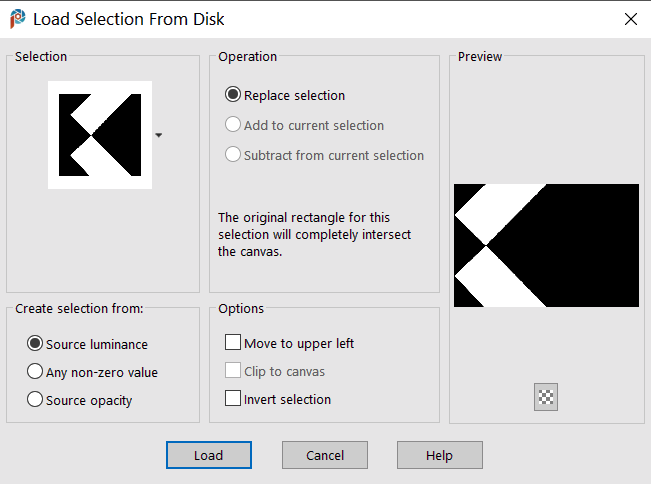
Selections / Load/Save Selection / Load Selection for Disk
Machiko / Selection 1

Open your misted tube or use mine ae1.png
Edit / Copy
Edit / Paste into Selection
Selections / Select None
Adjust / Sharpness / Sharpen
Effects / Plugins / Xero / Porcelain (Default)
Effects / 3d Effects / Drop Shadow / 1 / 1 / 50 /1 Black
Repeat the Drop Shadow with / -1 / -1 / 50 / 1 Black
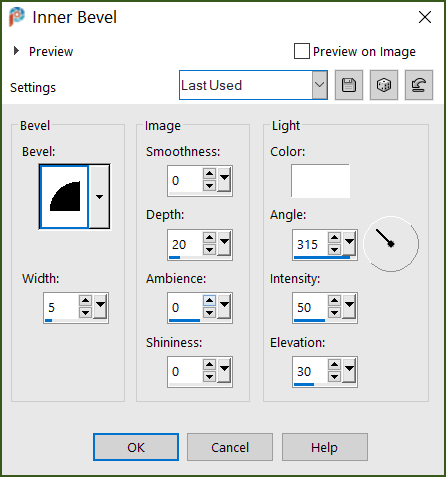
Effects / 3d Effects / Inner Bevel
In the Layers Palette Activate the Copy of Raster 1
Selections / Load/Save Selection / Load Selection from Disk
Machiko Selection 2
Selections / Promote Selection to a Layer
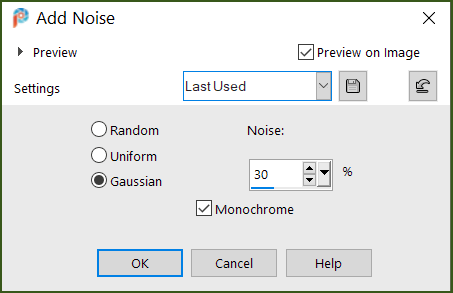
Adjust / Add Remove Noise / Add Noise / Gaussian 30% / Mono Checked
Effects / 3d Effects / Inner Bevel / (Same settings as before)
Effects / Plugins / Alien Skin Eye Candy Impact / Glass
(Settings Tab / Clear)
Selections / Select None
Layers / Duplicate
Image / Mirror / Mirror Horizontal
Layers / Merge / Merge Down
Activate the Top Layer
Open the Misted Tube again
Window / Duplicate / or Shift D (we will work on this Image)
Effects / Plugins / Flaming Pear / Flexify 2

Image / Resize / Resize 10% (All Layers Checked)
Effects / Image Effects / Alien Skin Eye Candy Impact / Glass
(Settings Tab / Clear)
Edit / Copy
Edit / Past as a New Layer on your Original work
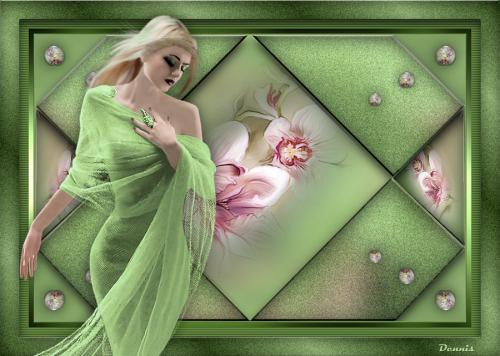
Move the Image into the Upper Left Corner (see example)

Effects / Plugins / Filters Unlimited / Simple / Top Left Mirror
Layers / Duplicate
Image / Resize 80%
Layers / Duplicate
Image / Resize 80%
Layers / Merge / Merge Down (x2)
Effects / 3d Effects / Drop Shadow / 0 / 0 / 60 / 40 Black
Layers / Merge / Merge Down (x2)
Effects / Drop Shadow / 0 / 0 / 60 / 40 Black
In your Layers Palette / Activate the Copy of Raster 1
Selections / Load/Save Selection / Load Selection from Disk
Load MachikoSelection 3

Selection / Promote Selection to a Layer
Open your Misted Tube
Edit / Copy
Edit / Paste into Selection
Adjust / Sharpness / Sharpen
Selections / Select None
Effects / 3d Effects / Inner Bevel (same settings as before)
Effects / Plugins / Alien Skin Eye Candy Impact / Glass (clear)
Layers / Duplicate
Image / Mirror / Mirror Horizontal
Layers / Merge / Merge Down
Adjust / Sharpness / Sharpen
Image / Add Borders / 1pixel (your dark color #390771)
Image / Add Borders / 1 pixel (your light color #bda0d6)
Image / Add Borders / 1pixel (your dark color #390771)
Selections / Select All
Image / Add Borders 10 pixels (a neutral color)
Selections / Invert
Flood Fill with the Gradient from the start
Effects / Plugins / Filters Unlimited / Graphics Plus / Cross Shadow (default)
Selections / Select All
Image / Add Borders 20 pixels (your dark color #390771)
Selections / Invert
Effects / Image Effects / Blinds
Selections / Select All
Image Add Borders 40 pixels (your light color #bda0d6)
Selections / Invert
Materials Palette
Change the values of the Linear Gradient / Angle 45 / Repeats 7 / Invert checked
Flood Fill the Border with this Gradient
Adjust / Add Remove Noise / Add Noise (settings still in memory)
Adjust / Sharpness / Sharpen
Effects / Plugins / Alien Skin Eye Candy Impact / Glass (clear)
Edit / Copy your main tube
Edit / Paste as a New Layer
Resize to 110% if you use my Image
Image / Mirror / Mirror Horizontal
Place as in the Example
Adjust / Sharpness / Sharpen
Add a Drop Shadow of your choice (or 0 / 0 / 60 / 40 Black)
Layers / New Raster Layer
Add your name of watermark
Image / Add Borders / 1 pixel (your dark color #390771)
Resize if you like
Adjust / Sharpness / Sharpen
File / Save as jpeg
I hope you enjoyed my first tutorial
**********
Thank You Dennis for lovely version

-
Pour accéder aux tutos des créateurs
cliquez sur le cœur
en dessous de leurs
bannières

-

Derniers Articles
-

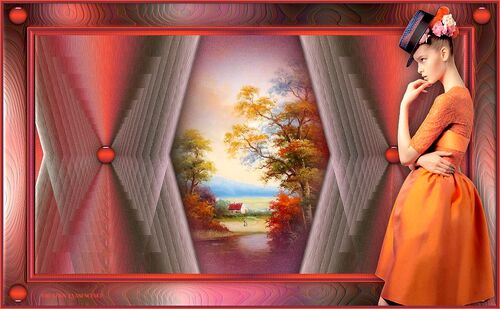
Lumières d' Automne
-


-


-


-

-


-

-

-

-


-


-

-


-


-


-

-

cliquez sur le logo au dessus site amis pour ouvrir la page
-

-

-


-


Pour mettre mes bannières
sur votre site ,cliquez sur l'une d'elles vous aurez les codes pour les incorporer
To put my banner on your site, just click on anyone of the two you have and you will have the codes on the opening page
-
-

-
Allez visiter le site de Rénée Graphisme pour vos filtres et plein d'autres choses encore
-
Livre d' Or


