


-
Par Evanescence* le 12 Juin 2015 à 01:25

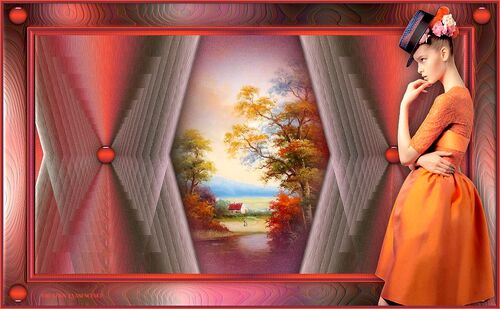
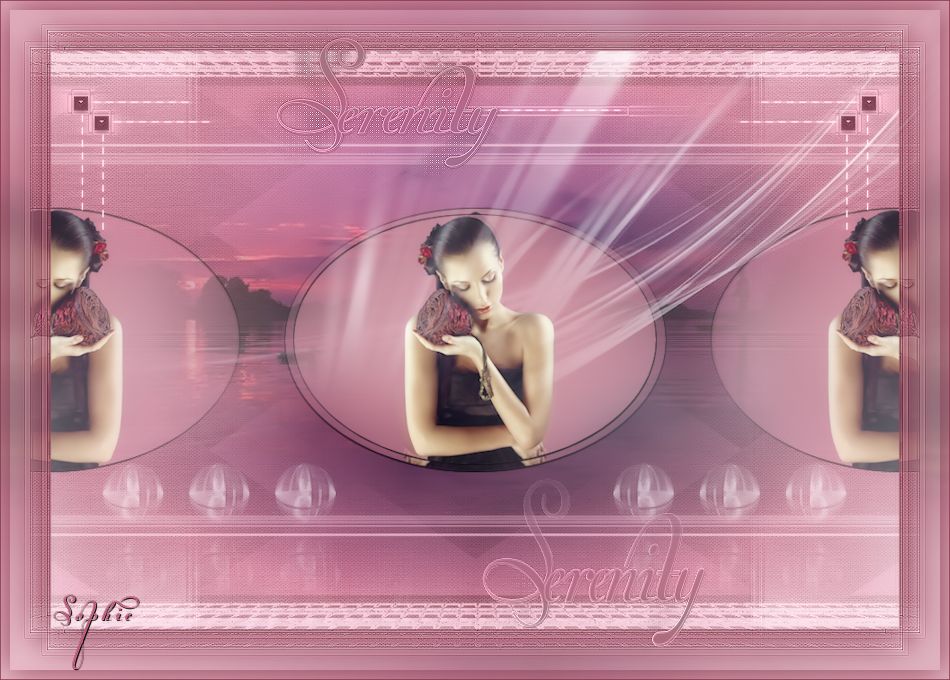
SERENITY
BY
MARIA JOSE PRADO

MATERIAL
1 Tube misted paysage
1 tube femme ou autreColors for this turorial
Foreground - #c4b8b8 clear
Background - #917b7b dark
click here for matérial

PLUGINS
Caroline & Sensibility
Mehdi
Filter Factory Gallery "M"
Simple
Filters Unlimited2
MurA's Meiter
Plugin UnpluggedXHelp yourself with this arrow


1.- Prepare a gradient with 2 colors of your tube or others
see configuration

2.- Open a transparent layer - 950x650px -
filli it up with background color ou dark one
3.- Layers - New Mask Layer - chmasks_portrait5
layers - merge group

4.- Plugin - Caroline & Sensibility - CS-LDots - Blend Mode - Screen

5.- Layers - Add New Layer - Fill it with gradient
6.- Plugin Mehdi - Sorting Tiles

7.- Effects - Image Effects - Seamles Tiling

8.- Effects - Edges Effects - Enhance
9.- Plugin - Filter Factory Gallery "M" - Loom

10.- Plugin - Simple - 4 Way Average
11.- Filters Unlimited2 - Paper Texture - Canvas Fine

12.- Layers - Arrange - Move Down
13.- Selections - Load Selection from Disk - serenity_mj
14.- Promote Selection to Layer
15.- Keep selection - Effects - Texture Effects - Mosaic Glass

16.- Deselect all - Plugin - MurA's Meiter - Perspective Tiling

17.- Layers - Duplicate - Image - Flip Vertical - Layers - Merge Down
18.- Put a blend mode of layer for screen or other
19.- Copy and paste newdecoabstrat - as new layer
20.- Activate Raster 1 - Selection - Load Selection From Disk serenity_1_mj
21.- Transform selection into Layer - Layers - Move Up
22.- Adjust - Blur - Gaussian Blur - Radius at 50
23.- Copy and paste as new layer - your principal tube
24.- Adjust- Selections - Invert -
cancel or suppress on keyboard - Selection Inverse
25.- Layers - Merge Down - Drop Shadow 1, 1, 100, 1, black color
Repeat in negative values (-1), (-1)
26.- Deselect all - Layers - Duplicate - Layers - Move Down
27.- Effects - Image Effects - Seamless Tiling - Horizontal

28.- Effects - Reflection Effects - Rotating Mirror - (180 ou 0) depends on your image

29.- Activate layer on top (promoted Selection)
30.- Image Resize - 95% - All Layers not checked
31.- Activate Raster 1 -
Copy and paste your Misted tube landscape as new layer
32.- Put opacity of layer between 70 and 80% - your choice
33.- Copy and paste as new layer - deco_1
34.- Layers - Arrange - Bring To Top
35.- Effects - Image Effects - Offset

36.- Copy and pste as newl ayer - deco_2
37.- Effects - Image Effects - Offset

Your layers should be like this at moment

38.- Image - Add Borders - 1px - dark color
39.- Image - Add Borders - 5px - clear color
40.- Image - Add Borders - 1px - dark color
41 - EDIT COPY
42.- Image - Add Borders 45px - white color
43.- With Magic Wand Select white border -
paste into this selection of border the image you copied just before
44.- Adjust - Blur - Radial Blur

45.- Selections - Invert - Drop Shadow - 0, 0, 100, 50, dark color (background)

46.- Selections - Modify - Contract 10 - Repeat drop shadow
47.- Selections - Invert - Plugin UnpluggedX - Defocus

48.- Adjust - Sharpness - Sharpen More
49.- Selections - Invert - Drop Shadow - 0, 0, 100, 50, dark color (background)
50.- Selections - Select All - Modify - Contract 10 - Repeat drop shadow
51.- Image - Add Borders - 1px - dark color (background)
52.- Image - Resize - 950px Width
53.- Copy and paste tube of texto like model
Put blend mode of layer for Luminance Legacy L
54.- Layers - Merge All Flatten - Adjust - One Step Noise Removal
55.- Sign your creation and register in jpg mode
Thank for having followed my tutorial
I hope you enjoy it
Maria José
My version
woman tube of Gabry
Landscape tube of Guismo
that I Thank

-
Pour accéder aux tutos des créateurs
cliquez sur le cœur
en dessous de leurs
bannières

-

Derniers Articles
-

Lumières d' Automne
-


-


-


-


-


-


-

-

-


-


-


-


-


-


-

-

cliquez sur le logo au dessus site amis pour ouvrir la page
-

-

-


-


Pour mettre mes bannières
sur votre site ,cliquez sur l'une d'elles vous aurez les codes pour les incorporer
To put my banner on your site, just click on anyone of the two you have and you will have the codes on the opening page
-
-

-
Allez visiter le site de Rénée Graphisme pour vos filtres et plein d'autres choses encore
-
Livre d' Or


