


-
Par Evanescence* le 24 Avril 2016 à 14:49

Link on tag
This tutorial is property of Joanna
This traduction is property of Evanescence

MATERIAL
Thanks to DBK for tube
and to site PICSPEED for landscape
FILTERS
Graphics Plus, Cross Shadow

1 - Put selections in selections file
2 - Open a transparent layer of 800x600
Selection, select all
3 - copy and paste landscape image into selection
Deselect
4 - copy and paste woman tube
5 - image, resize at 55 %,
all layers not checked
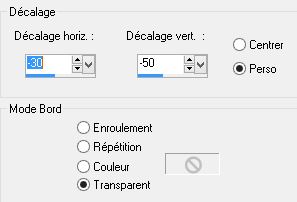
6 - effects, image effects, offset :
7 - adjust, sharpness, sharpness
8 - effects, 3D, drop shadow

9 - Merge all visible layers
10 - add a new layer, fill it up with black color
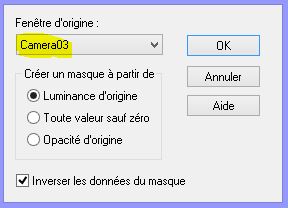
11 - Layer new layer of mask from image :
12 - Merge group
13 - image, resize at 90 %
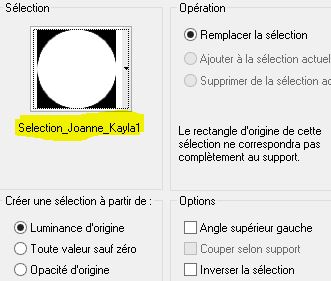
14 - selection, charge selection, from disk :
15 - sélection, transform into layer
16 - stay on this layer. Image, resize at 50 %
17 - go on on layer (groupe raster 1)
18 - press on delete on keyboard
Deselect
19 - go on firt layer on bottom of pile
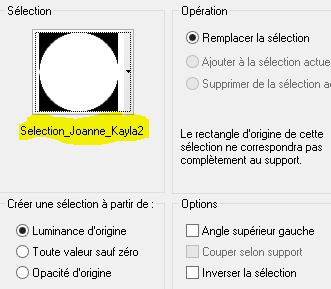
20 - selection, charge selection, from disk :
21 - sélection, inverse
22 - adjust, blur, gaussien blur at 15. Selection, inverse
23 - effects, 3D, drop shadow step 8
24 - do this drop shadow again but with value -5 vertical and horizontal.
Deselect
25 - sélection, charge selection, from disk:

26 - effects, texture effects, antic mosaic :

27 - sélection, inverse
28 - effects, 3D, drop shadox like steps 23 and 24
Deselect
29 - copy and paste my watermark in materiel
30 - sign your version
31 - layers , all flatten
32 - image, add borders :
1 of 2 pixels black
1 of 30 pixels color 5e2405
1 of 2 pixels black
33 - select border of 30 pixels with magic wand
34 - selection, transform into layer
35 - filter Graphics Plus, Cross Shadow , défault
36 - effects, textures, antic mosaïc like in point 26
37 - merge down
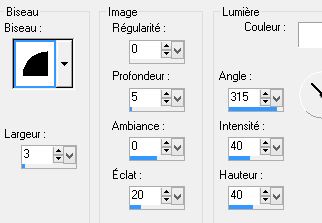
38 - effects, 3D, inner bevel :
39 - deselect
40 - register in Jpg
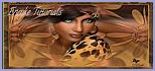
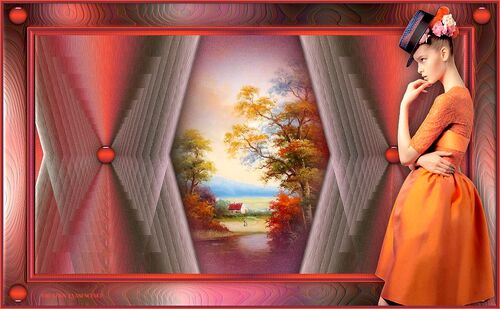
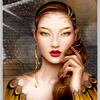
Ma version
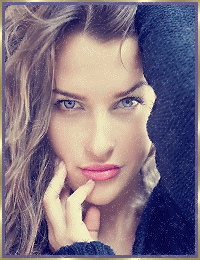
Tube femme de Joannie
que je remercie

-
Pour accéder aux tutos des créateurs
cliquez sur le cœur
en dessous de leurs
bannières

-
Derniers Articles
-

Lumières d' Automne
-


-


-


-

-


-


-

-

-


-


-


-


-


-


-

-

cliquez sur le logo au dessus site amis pour ouvrir la page
-

-

-


-


Pour mettre mes bannières
sur votre site ,cliquez sur l'une d'elles vous aurez les codes pour les incorporer
To put my banner on your site, just click on anyone of the two you have and you will have the codes on the opening page
-
-

-
Allez visiter le site de Rénée Graphisme pour vos filtres et plein d'autres choses encore
-
Livre d' Or


