
/image%2F0654964%2F20241204%2Fob_9a5cd9_unnamed.jpg)

Link on tag
This tutorial is property of Joanne Tutoriels
This translation is property of Evanescnce


PLUGINS
Mura's Meister, Perspective Tiling
Frischluft
Flaming Pear, Flexify 2
Graphics Plus, Cross Shadow
Simple
MATERIAL

Un grand merci à KAT pour son magnifique tube féminin.
Merci également aux auteurs respectifs de l'image de la perle
et du tube des nuages.
1 - place Selections in your file PSP
2 - place gradient in your gradient file PSP
3 - in colors palette, put color c7a985 as foreground
and as background color 734229
4 - make a radial gradient like this

5 - colors palette :

6 - open a transparent layer 800x600.
select all
7 - copy and paste image "Perle" inton selection
deselect
8 - adjust, blur, gaussian blur at 15
9 - add a new layer
fill it with gradient
10 - adjust, color and saturation, colorize :

11 - de distorsion effect, polar coordinate
rectangular to polar
repeat

12 - sélections charge from disk
selection 1

13 - suppress or delete
deselect
14 - sélection from disk
selection 2

15 - Texture effects, blinds
light top left

16 - deselection
17 - sélection charge from disk
selection 3

18 - plugin Mura's Meister, Perspective Tiling , default
deselect
19 - plugin Frischluft, Amiga Rulez :

20 - plugin Flaming Pear, Flexify 2 :

21 - reflexion effects, rotation mirror
reflect

22 - adjust, sharpness, sharp, 2 times
23 - effects, 3D, drop shadow :
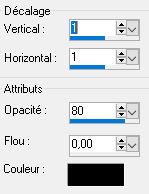
24 - effects, 3D, drop shadow :

25 - plugin Graphics Plus, Cross Shadow :

26 - copy and paste your principal tube
27 - image, resize at 75 %, only 1 layer
28 -asjust, sharpness, sharp
29 - effects, 3D, drop shadow like in step 24
30 - drop shadow again,with -1 vertical and horizontal
31 - adjust tube like model
32 - go to bottom layer
33 - copy ans paste nuages tubes. d'ont move it
34 - reflexion effects, rotatif mirror like in step 21
35 - duplicate layer
36 - copy and paste my watermark
37 - sign your version
38 - merge all layers
39 - image, add borders :
1 of 2 pixels black
1 of 30 pixels white
1 of 2 pixels black
40 - with magic wand, select border of 30 pixels
41 - copy image "Perle" and paste into selection
42 - adjust blur gaussian blur at 10
43 - plugin Simple, Pizza Slice Mirror
44 - plugin Graphics Plus, Cross Shadow, default
45 - effects, 3D, drop shadow like in steps 29 and 30
46 - deselect
47 - save as JPEG
Tube de Mina
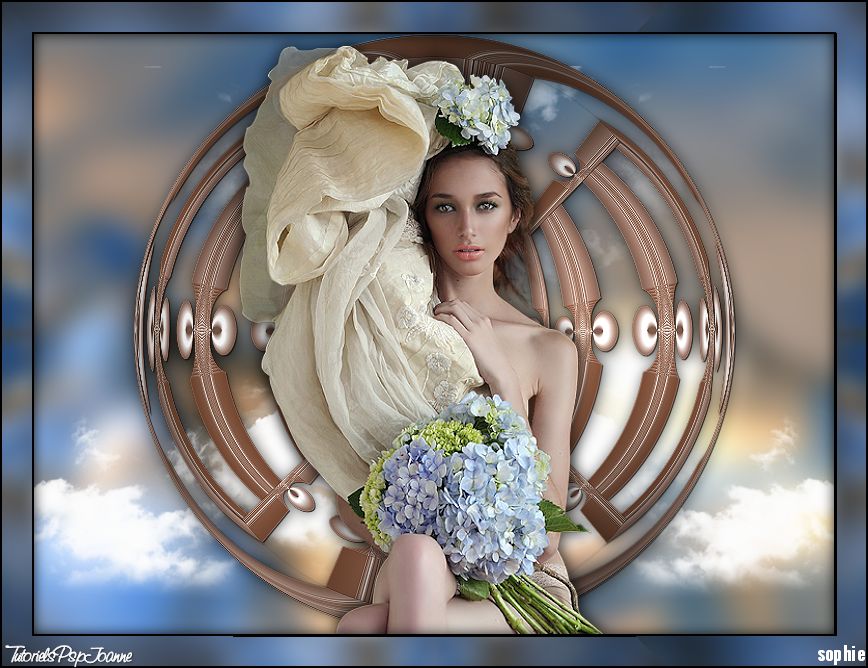


/https%3A%2F%2Fekladata.com%2FYPI8DwfBf4bU6fHRpkzcSxO2pDU%40500x338.jpg)
/https%3A%2F%2Fekladata.com%2F_hXetnNky_6mWLePzNC4_ZUg_NQ%40500x364.jpg)