
/image%2F0654964%2F20241204%2Fob_9a5cd9_unnamed.jpg)
MORGANE
FROM JOANNE
If you want to present her tutorials on your forums or sites please ask her first. If you publish your creation on a site or a blog please put a link towards the tutorial. Thank you to understand and respect the rules.
*********
The tubes Joanne uses have been sent by the authors on different groups
And she has their permission to use them
Some of them have been found on the WEB,
If you see a tube that belongs to you, contact Joanne or myself
And a link towards your site will be added.
**********

Link of Joanne Site on création
**********
FILTERS
Flaming Pear / Flexify 2
Graphic Plus , Emboss
MATERIAL

You can help you with this arrow

1/ place selection in you selection file
2/ place your gradient in your gradient file
3/ Prepare your gradient with this configuration
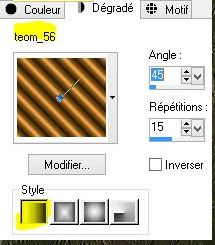
4/ Open a transparent raster 800 x 600, select, select all
5/ copy your landscape tube,and paste into selection
6/ call this raster "Landscape" and close it
7/ add a new layer,put the gradient you have prepared in it
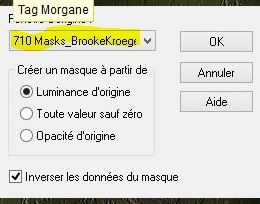
8/ raster, new raster of mask from image
select 710 masks Brook...
9/ Merge all layers
10/ layer duplicate, image flip Horizontal
11/ Merge visible layers
12/ layer, diplicate, merge all, call this raster " cadre 1"
13/ duplicate layer, stay on copy and close raster "cadre 1"
14/ Effects, distorsion effects,Polar coordinates

15/ Plugin flaming Pear, Flexify 2

16/ Effects, image effects
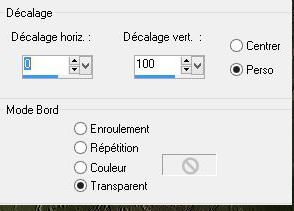
17/ Duplicate layer, merge down
18/ Duplicate layer,Image flip vertical, merge down
and call it " cadre 2"
19/ Charged selection from disk

20/ press delete, all deselected
21/ Open raster called " cadre 1"
22/ layer duplicate,merge all visible layers
23/ Adjust, clearness, clearness
24/ Plugin graphic plus, emboss, all numbers at zero
25/ Drop shadow 3/3/100/10 black color
26 /do it again with negative -3/-3/100/10/ black color
27/ go on raster " landscape", open it
28/ copy and paste your tube
29/ resize image at 60%, all layers not clicked
30/ place this tube as on the model
31/ adjust , clearness, clearness
32/ same Drop shadow than at point 25
33/ go to raster on top of pile
34/ copy and paste my watermark given in material
35/ sign your creation
36/ Merge all layers
37/ add a bordure 2px of black
add a bordure 30 px of white
add a bordure 2 px of black
38/ With Magic Wand select white border
39 / and paint it wih your dark color
40/ filtre graphic plus, crossed shadow , défault
41/ one more time
42/ reverse selection
43/ drop shadow of points 25 and 26, deselect
44/ register as a JPG
Thank you for having done my tutorial
hope you enjoy it
Joanne
Thanks to Roby2764 for the beautiful tube
and Brookekrogerdesigns for the mask
Thanks for the author of the Landscape ,
I unfortunately don't jnow his name
*******
My version
Tube of Azalée Thank you


/https%3A%2F%2Fekladata.com%2FYPI8DwfBf4bU6fHRpkzcSxO2pDU%40500x338.jpg)
/https%3A%2F%2Fekladata.com%2F_hXetnNky_6mWLePzNC4_ZUg_NQ%40500x364.jpg)